How to create content with AI and automation (without spending money)
From scripting to automated publishing: my complete workflow for creating content with OBS, AI, N8N, and multi-platform distribution.
Fradev / November 30, 2025
I’ve always wondered what the fastest method would be to generate content in an organized, simple, and practical way—something that would let me spend nothing and still produce high-quality content. After a lot of testing, I finally landed on a method where, with zero investment, I can go from video conception to final production of clips and automated posting. I’ll try to summarize everything in this file, but I’ll mention a lot of tools—so to fully benefit from this, we’ll walk through each step of the process in detail.
OBS Studio: The Starting Point
To record good content and truly engage your audience, knowing how to use OBS Studio makes a huge difference. For content recording, capturing both YouTube resolution and Shorts resolution is very practical when the goal is to generate clips, stories, TikTok posts, etc. For lives, being able to multistream to Twitch, Kick, YouTube, TikTok, X, etc., is also a big win. I’ve used several tools, but the latest one I’m using—and the one that fit me best—is Aitum Multistream. A YouTube channel that can help you configure both OBS and multistream is Abrigo 76.
Script: How to Create High-Quality Content
The script is your north star—and the crucial step that separates your content from most others. It’s how you build value into what you want to say and clarify ideas that were previously foggy. It’s undeniable that today, content creation includes some AI step. How you use AI depends 100% on how you want to create:
• If your method is more intuitive and creative, you’ll probably use AI for text correction, improving content, expanding existing content, and so on.
• If you struggle more with ideation and structure, AI can be your best friend at this stage.
The tools I use for research and content generation are:
• NotebookLM: An incredible Google tool. You can upload links, documents, text, and basically any file type and use them as sources so the AI can generate reports, summaries, study guides, blog posts, mind maps—and yes… podcasts and videos about the files you provided. Having a podcast “talking” about the topics you want to record a video on is one of the best ways to generate insights and ideas for higher-quality content.
• Comet by Perplexity: Comet is a Chromium-based browser with an embedded AI assistant to improve how you search the internet. (WARNING: AI browsers can use script injection if you operate while logged into malicious sites. For that reason, never save passwords or sensitive info from your main browser into Comet, and I don’t recommend it as a primary browser.) Comet uses AI to help your research: generate ideas, go deep on a topic, produce documents and reports, and suggest script ideas for your video.
• Atlas by OpenAI: Atlas offers a similar experience to Comet, but in terms of research depth, I consider Atlas slower and less deep. Still, if you’re on a paid OpenAI plan but not Perplexity, Atlas can be an option—just keep security in mind when using AI browsers.
If you DON’T have Perplexity Pro or ChatGPT Plus/Pro, you can use both browsers on free plans with limitations, or use a Student email to get Perplexity Pro for free via this link. Tip: To get a student email, you can do it legitimately or “clandestinely.” To do it legitimately, you can enroll in a government program that lets you generate an ID and get, in addition to a valid email, a student card for discounts—here’s a video to follow this method. To do it “clandestinely,” you can generate a temporary student email and try your luck via this link.
With time and practice using these tools, content creation becomes far more productive, and you can focus your time on other steps that also need to be aligned to reach a more “professional” outcome—even if you’re a one-person army. Speaking of productivity, one tool that changed how I collect, produce, and ship content online was N8N. It allowed me to build automations that replace workflows that used to demand time, attention, focus, and creativity—and I replaced some manual processes with fully automated ones.
Thumbnails / Images / Covers to Illustrate Your Idea
One of the ways I validate my scripts and content before posting is by generating the images needed to “package” that content. For example: if I built a script for a video or a live, at this stage I try to create the video thumbnail to see if it feels interesting—this helps validate the idea and gives me direction for recording and for generating clips later (I’ll cover that further below).
If, for example, I’m creating a blog post like this one, I generate the blog cover images at this stage to visually see the content, organize how I’m going to publish it, and decide when.
There are many image generation tools: ChatGPT, Midjourney, Dall-e 3, Stable Difusion, Leonardo AI, and so on. But in this post, I’m focusing on two tools—and I believe with them you won’t need the other options:
Google’s Nano Banana
One of the best tools today to generate any type of image to illustrate your scripts is Nano Banana. My workflow is: I gather visual references for what I want to build, add an image of myself to include (for a thumbnail, for example), and define the visual effect I want to cause in the viewer. Using my visual references, paired with a good prompt (clear, direct, but with context) and providing my script as text reference, I get the images I need for any content I produce.
Canva
Canva is a multi-purpose tool that can help you from creating your design (especially if you still don’t have strong references) to editing after Gemini generates your image with Google’s watermark. Also, if you’re on a paid Canva plan, you’ll have access to several AI tools to add any type of element to your content.
Tip: To remove watermarks from generated images, I recommend Watermark Remover. To remove watermarks from videos, I use Ez Remove AI.
N8N: The Magic Tool
To talk about N8N properly, I’d need a dedicated post, because building workflows like the ones I’ll mention requires a lot of technical details. But since I’m a programmer and I’m more comfortable using these kinds of tools, I’ll make them available to you for free on my site in a simple way, in my Courses Area. Or you can check My YouTube Channel, where I show some of my workflows, like this one: Crypto Research & Analysis Agent. If you prefer written content, you can access My Blog, where I publish posts about automation or share N8N tips, like this example.
I’m going to create a dedicated post on how to install N8N and configure it to run your automations. In this one, we’ll cover the concept behind each automation I built and which manual replacement I applied.
Information
⸻
image 1
Pasted image 20251130021647
image 2
Pasted image 20251130021747
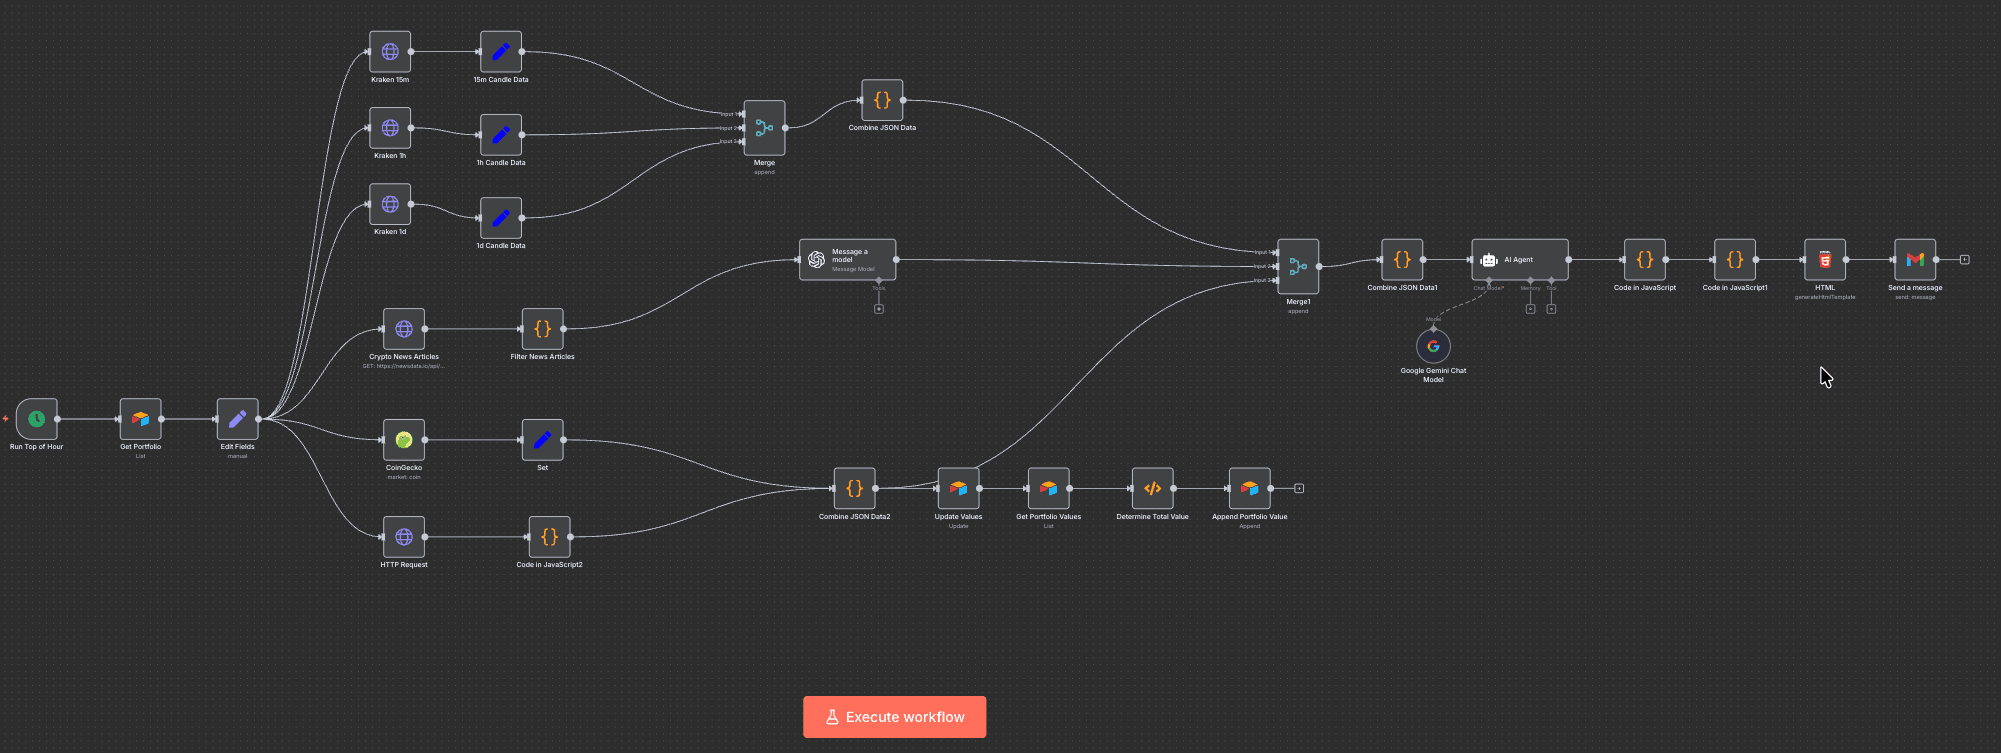
My information-gathering process was basically two manual routines I ran every morning. Since I produce content about Crypto and Tech (distinct niches), I access specific sites to gather information about each niche. Because they were two different “workflows,” I decided to build two separate automations.
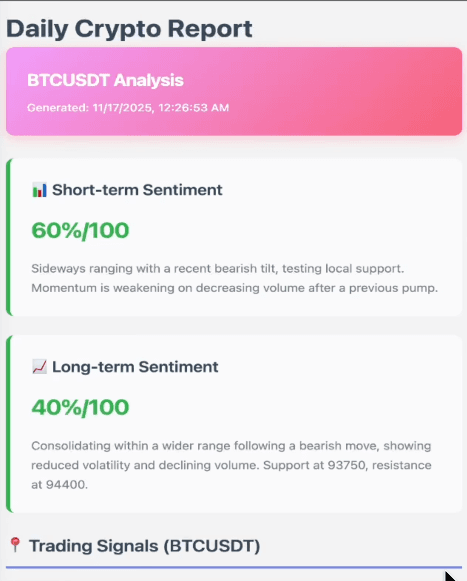
In image 1, I use an Airtable spreadsheet that contains the assets I want to monitor. My automation fetches the values of each cryptocurrency to keep my spreadsheet updated using the APIs of CoinGecko and CoinMarketCap. I also use the News Data IO API to pull the most relevant news in the crypto market, where I can structure the information and plug in an AI Agent to analyze the news with a good system prompt (instructions for the AI). Finally, I use the Kraken API to pull candles in the timeframes I trade. Combining all this information—and adding a bit of JavaScript—I generate an HTML template that gets emailed to me daily at a specific time, like the example below:
Pasted image 20251130023253
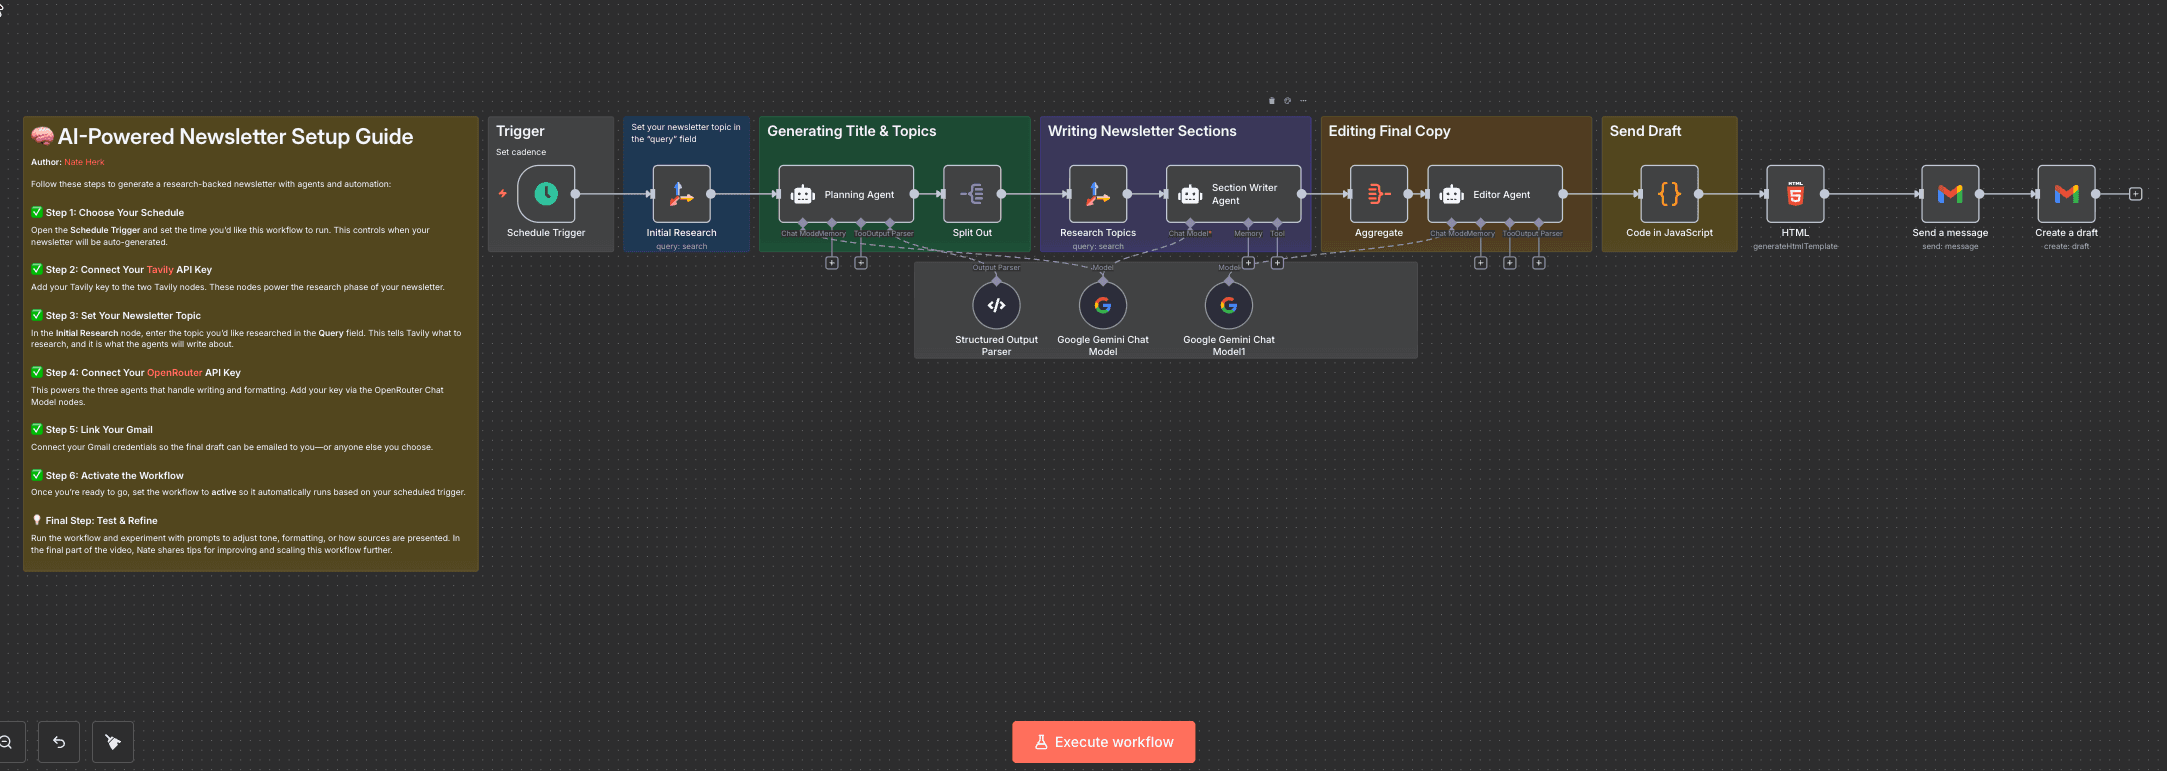
In image 2, to automate my information intake for the technology niche, I built an automation with Tavily, which pulls the top news within a time period I specify (weekly, monthly, or the last 24 hours, for example) using the sites I used to visit daily. Then, with my AI Agents, I format that content to generate an email with the summary plus several other types of materials.
If you still don’t see the value, here’s a very practical example: since the emails I receive daily are my own primary newsletters—where I know exactly where the information comes from and how it’s formatted—why not share that with people who don’t want the work of building the automation? That question is what made me turn this automation into a newsletter product for people who want to automate their information intake about Crypto and Technology. (Spoiler: version 2.0 would be a customizable newsletter where you can specify the sites or the type of content you want to receive.) That alone could become monthly subscription revenue from users running the same automations with me. This newsletter will be available on My Site.
Scripts and Content
⸻
To automate my content creation process, for example: once a week I sit down for a day to write what I’m going to post. To come up with current and interesting themes, I use the emails from the previous automation I built to gather information. That’s my daily archive of analyses and news.
I take those emails and automatically save them into a Notion database, and inside N8N—or through my site—I use an AI Agent that can connect to that information/news database and bring me ideas and content.
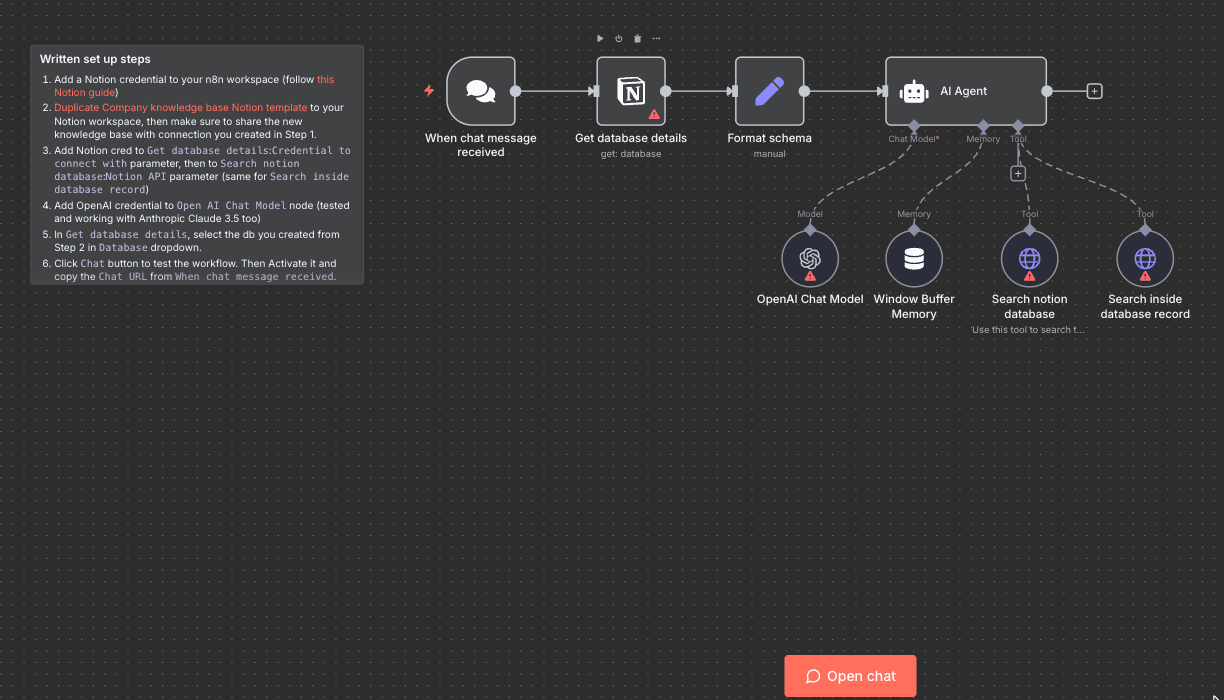
Pasted image 20251130025712
Tip: This automation is meant to bring me insights on themes that can generate compelling titles and timely content for the niches I explore. After I have the ideas, we go back to the step [[## Script: How to Create High-Quality Content]].
Video publishing
⸻
In the automated posting stage, I identified several barriers that prevent someone from having a fully automated publishing flow across all their social networks—and I’ll show how I did it spending as little as possible.
The first barrier is that almost all tools are paid. For N8N integrations, there’s Blotato, which costs $29 to post to all networks. So I decided to automate posting to X using N8N and use Buffer for the rest. The automation looks like this:
Pasted image 20251130145952
Tip: In Buffer, I used two different Google accounts (Buffer only lets you have 3 accounts on the free plan), so I grouped them like this: one account connects X, Threads, and LinkedIn, where I organize informative posts and tweets—mostly written content. In the other account, I connected Instagram, TikTok, and YouTube, where I organize short-form video, stories, and clips from the content I produce. I’ll talk more about Buffer in [[]]
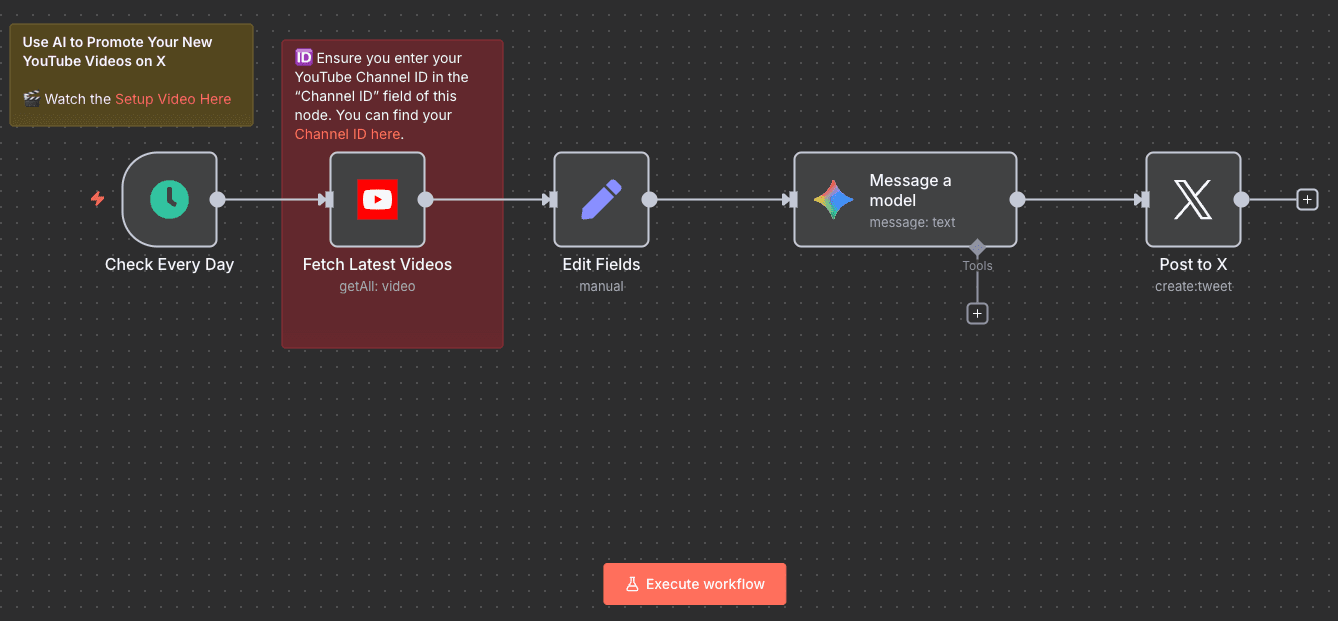
After generating the videos, I looked for ways to inform and publish them automatically (without paying for a service). The workflow goes to my YouTube channel at a specific time each day and checks whether I posted a new video in the last 24 hours (the automation runs once per day). If there’s a new video, it sends the video information to an AI Agent, which creates a post within the character limit X allows, then posts on X with the link to the new video. That’s how I built my first tool that integrates new YouTube videos with posts on my X, enabling an automated posting flow and producing results like this:

Pasted image 20251130150151
Meeting Scheduling
⸻
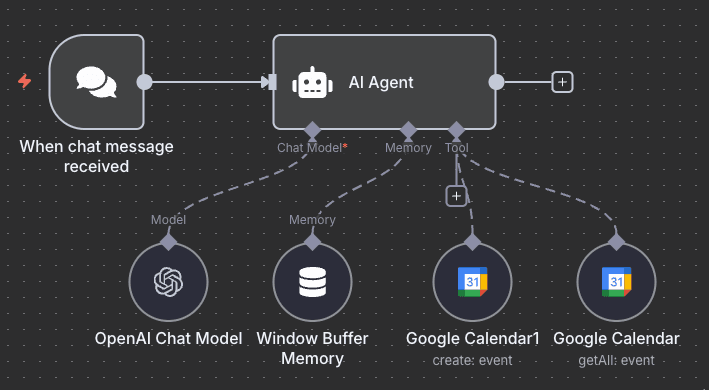
This automation has a more specific purpose, but I think it’s worth including to show another possibility. The community I’m helping to build offers mentoring services, and my first idea was: how could I have an assistant that helps me organize meetings with mentees so I can track and support them?
With that in mind, I decided to build an MVP inside my site to test it, and that’s how this automation was born:
Pasted image 20251130150737
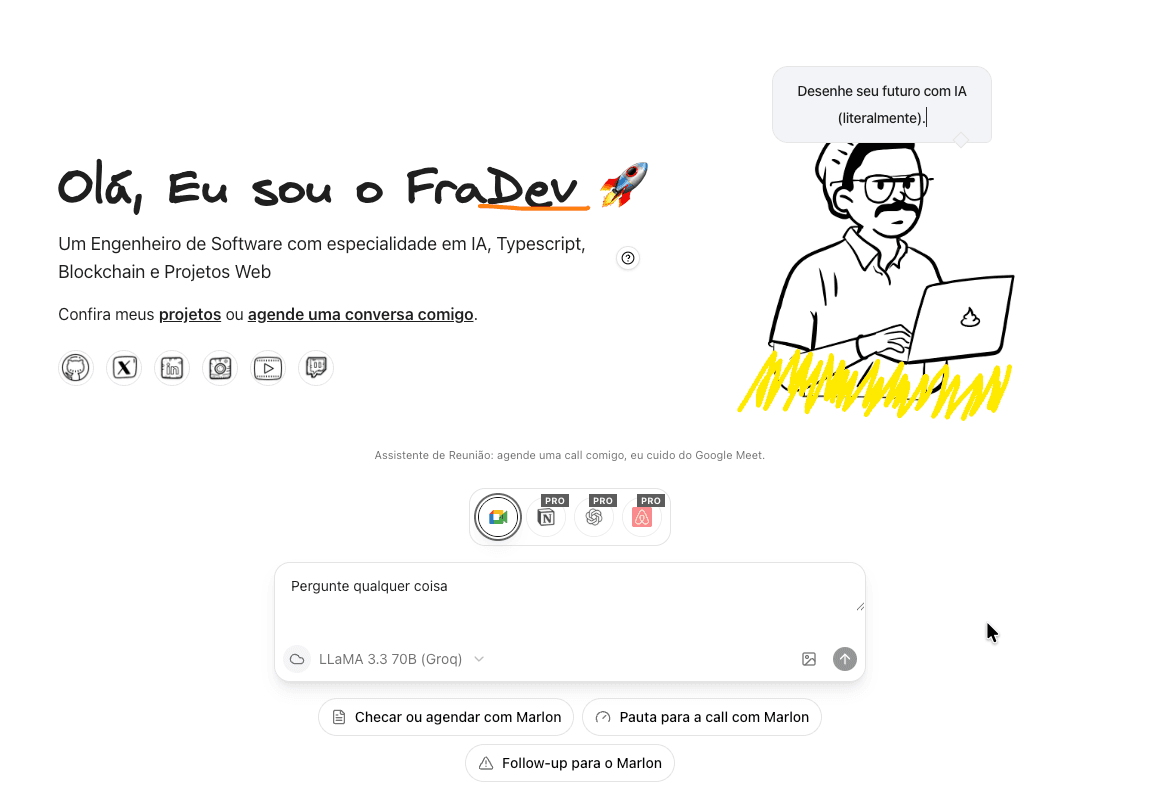
It seems—and is—very simple. When a user/mentee wants to schedule a meeting with me, they would ask the AI on my site for an available time slot, and it would handle my Google Calendar to schedule the meeting and notify the user via email—something a bit different from the usual Calendly. With that, I built this:
Pasted image 20251130151136
So the mentee would access my homepage, click the Google Meet button (which I’ll adapt to this automation), and ask to schedule a meeting. The AI would gather the information and schedule it (if there’s availability in the requested dates; otherwise, the AI is instructed to propose the closest available times/dates based on my calendar), like the example below:
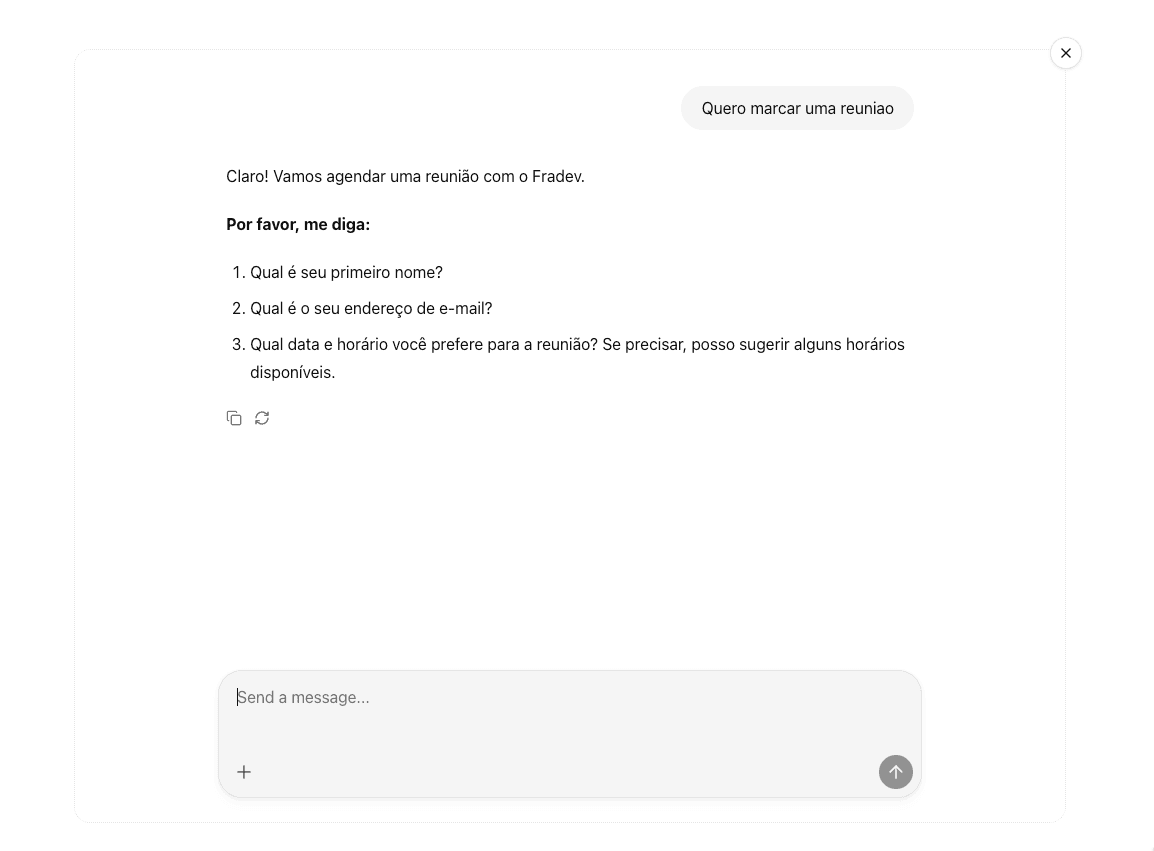
Pasted image 20251130151632
Posts: Tools and Organization
Okay, I just dumped a ton of information on how you can create content—but with all that, how do you organize and automate your posting? In this stage, we’ll cover two more tools that I still haven’t replaced because they bring me practicality and speed. I’ll also share my ideas for next steps that could add even more automation to this workflow.
Google Drive
Google Drive is what I use to organize the material I produce. But I’ve always struggled with organization, so I use the PARA method (Projects, Areas, Resources, Archive), where I try to fit every file into one of these four buckets:
• Projects: where new scripts and post ideas live.
• Areas: where posts are organized by content/network.
• Resources: where I save news and informational materials (links, blog posts, documents, articles)—anything I find valuable to generate content. This becomes the information source for scripts/posts.
• Archive: what I’m not actively using goes here.
Google only provides 15GB to store your videos and articles, which is very limited. To get more, you’d need a Google One plan. But using the tips I mentioned in this video, you can get a student email and secure FREE access to Google One using this link.
Buffer
Buffer lets me schedule the material I produce and organize it by social network completely for free. My limit is 3 accounts on the free plan, so I used two Google accounts to organize my posts in two groups:
• X, LinkedIn, Threads: I use these to organize informative posts, news, and articles I create.
• Instagram, TikTok, YouTube: I use these to organize videos and visual content (stories and shorts).
Organized this way, I built a flow that lets me spend a few hours on one day of the week and structure the week’s posts—or even the next weeks, depending on how much material you produce using the other stages.
Extra Tips
If you want “ready-to-ship” content to validate ideas and grow your reach online, there are some tools that can help. I’ll share a few examples in this section.
Videos -> Clips
One way to generate a lot of video content is by cutting clips out of your longer recordings. AI clipper tools are the new tech SAAS wave—a movement that started strong abroad and was replicated in the Brazilian tech scene after the creation of Real Oficial, a Brazilian version of foreign clippers. Some of the clippers I use for producing clips are listed below:
• Opus Clip
• Way in Video
• Restream
Articles -> Videos
Platforms like Eleven Labs let you take your script or article and add a voice to narrate it, giving you a narrated way to consume your written content and test how it feels. To illustrate that content, you can use Google’s Veo 3 to generate a video based on your text and pair it with the narration created in ElevenLabs. Or you can use NotebookLM to create a podcast about your text—or even a video.
Videos & Articles -> Ebooks
With this mass of content produced, it becomes easy to leverage AI as an assistant to document, organize, and structure your content into a learning format that can be replicated and that adds value to the reader. That’s why I started using my videos, articles, and blog/LinkedIn/X posts as sources to build my ebooks—using ChatGPT with the reference files attached to the project. This way, I can build high-value content, and then comes the editing and validation step. The main point is: by producing one piece of content, you can generate many others from it.
⸻


